
Today we will do the actual construction on this dress... it's nothing too complicated, and for me the sewing took a lot less time than the drafting.

Again, I apologize in advance for the blurry, grainy, and off-color photos. Also, please excuse the avocado-and-banana covered floor. Gaiw was having too much fun while I was sewing!
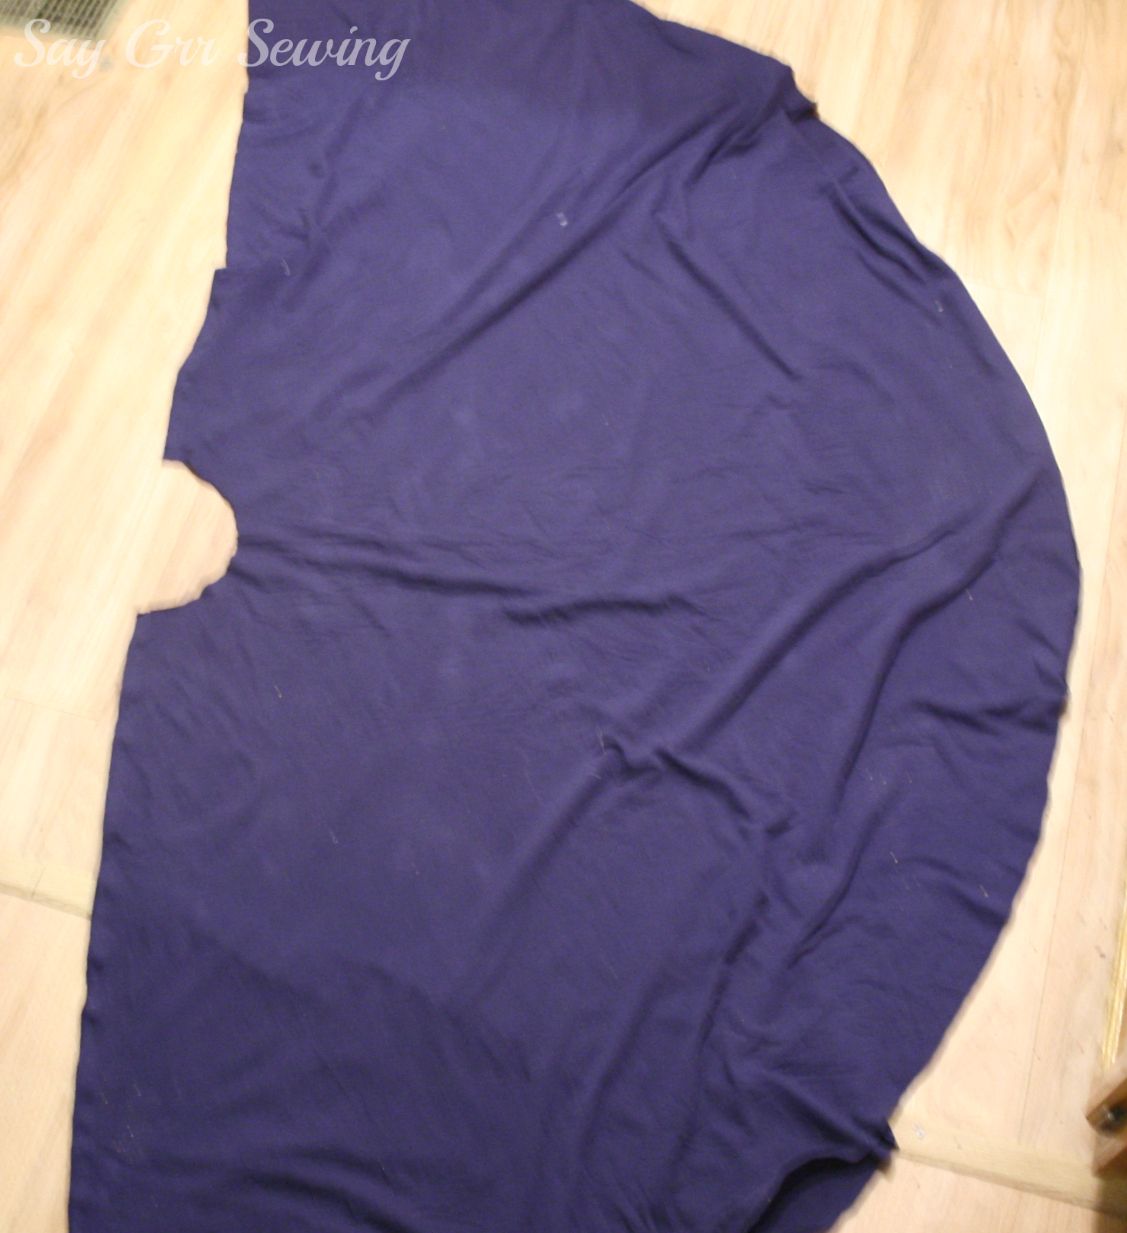
I started off by laying one circle skirt piece on the floor, right side up, and laying the other piece on top, right side down. I pinned along the long straight sides, then sewed, using a stretch stitch and the seam allowance that I added during the drafting stage.
Set the skirt aside for now and we'll work on the bodice. Pin the front overlay pieces right sides together with the back bodice, and sew only the shoulder seam.

Fold the ruffle strip in half the long way, for a strip that is super long by 1.5 inches, and press it. Since I was using my ruffler foot to gather mine, I also slipped some fusible tape between the layers and steamed them together. However, I think that wonder-tape works better, since it washes away and won't permanently alter the stretch. It just so happens that my daughter got ahold of mine and stuck parts of it all over the floor, then tangled the rest in knots. =( Anyway, the ruffle:

When it is all pressed you should have something like this:

Next, gather it all along the side with the raw edges. Again, I used my ruffler foot, but you could easily do a machine basting stitch and pull the bobbin threads if you don't have one.

Flip your bodice piece right side out, press the shoulder seams open, and pin the ruffle to the front, matching raw edges.

I decided which way I wanted my bodice to cross and cut the ruffle short on the under side for a little less bulk, but it isn't necessary. Sew the ruffle on with a stretch stitch then flip it up and press:

Here you can see where the ruffle is cut shorter:

Topstitch all the way around with a twin needle, no picture.
Now, lay the neckline facing on top of the bodice underlay, right sides together, and pin. Sew using a stretch stitch, then trim close to the stitching.

Flip the facing to the inside and press.

Topstitch with a twin needle...

Then trim close to the stitching on the wrong side.

Flip the bodice pieces you've already sewn so they are wrong-side out, and lay them with the back down, then lay your bodice underlay right side down on top. Pin the shoulder seams together as far as you can, and stitch with a stretch stitch as far as you can.

Press the seams open, and tack underlay shoulder seam down next to the ruffle on the outside, as invisibly as possible. When it is all right side out, it should look like this.

Now open this out and lay it face up, with the front overlay and front underlay on one side, and the back bodice on the other side:

Now lay a sleeve on top, right side down, and pin the center of its shoulder to the shoulder seam, and pin along the rest of it. It might look a little ripply and bumpy:

Sew it slowly and carefully with a stretch stitch and everything will smooth out. Fold the sleeve away from the body and you will have this:

Repeat for the second sleeve, and when it's set out in front of you it will look something like this:

Turn it wrong side out and sew from the bottom of the sleeve, pivot at the underarm, and sew down the side seam, using a stretch stitch on both sides:

You should have this now:

If you are adding nursing cutouts, now is the time. Try your bodice on and mark with chalk an approximate outline of the opening you will need:
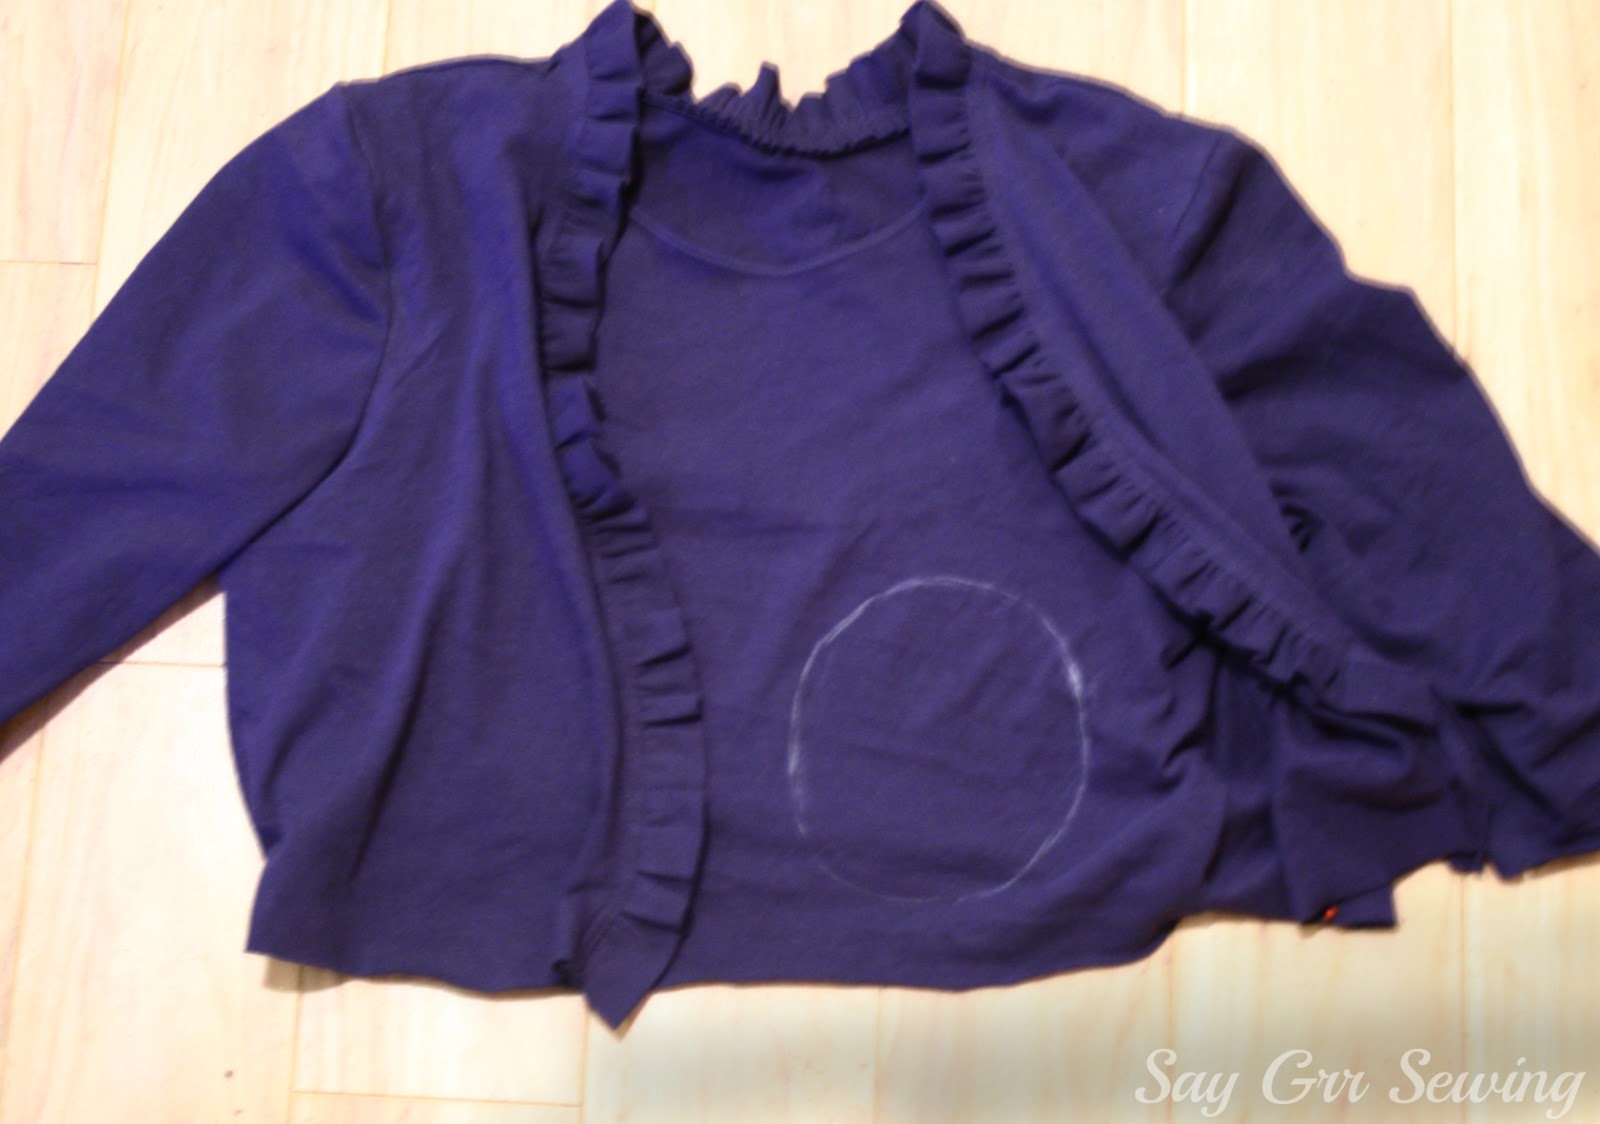
Find the center of this mark, and measure to the side seam and down to the waistline, make an x at the center on both sides:

Cut two circles from knit scraps that are about 1inch bigger in diameter than your chalk 'circle' My chalk outline was 6 inches, so each of the circles I cut from scraps were 7 inches. Fold your circles in quarters to find the center, and match them up with your x marks:

Open out your circles and pin well:

Sew around the circle with a half-inch seam allowance, using a stretch stitch. Trim the inside of the circle out through both layers close to the stitching:

Now fold your circle to the inside of the bodice underlay, press, and pin in place:

Topstitch using a twin needle or a stretch stitch:

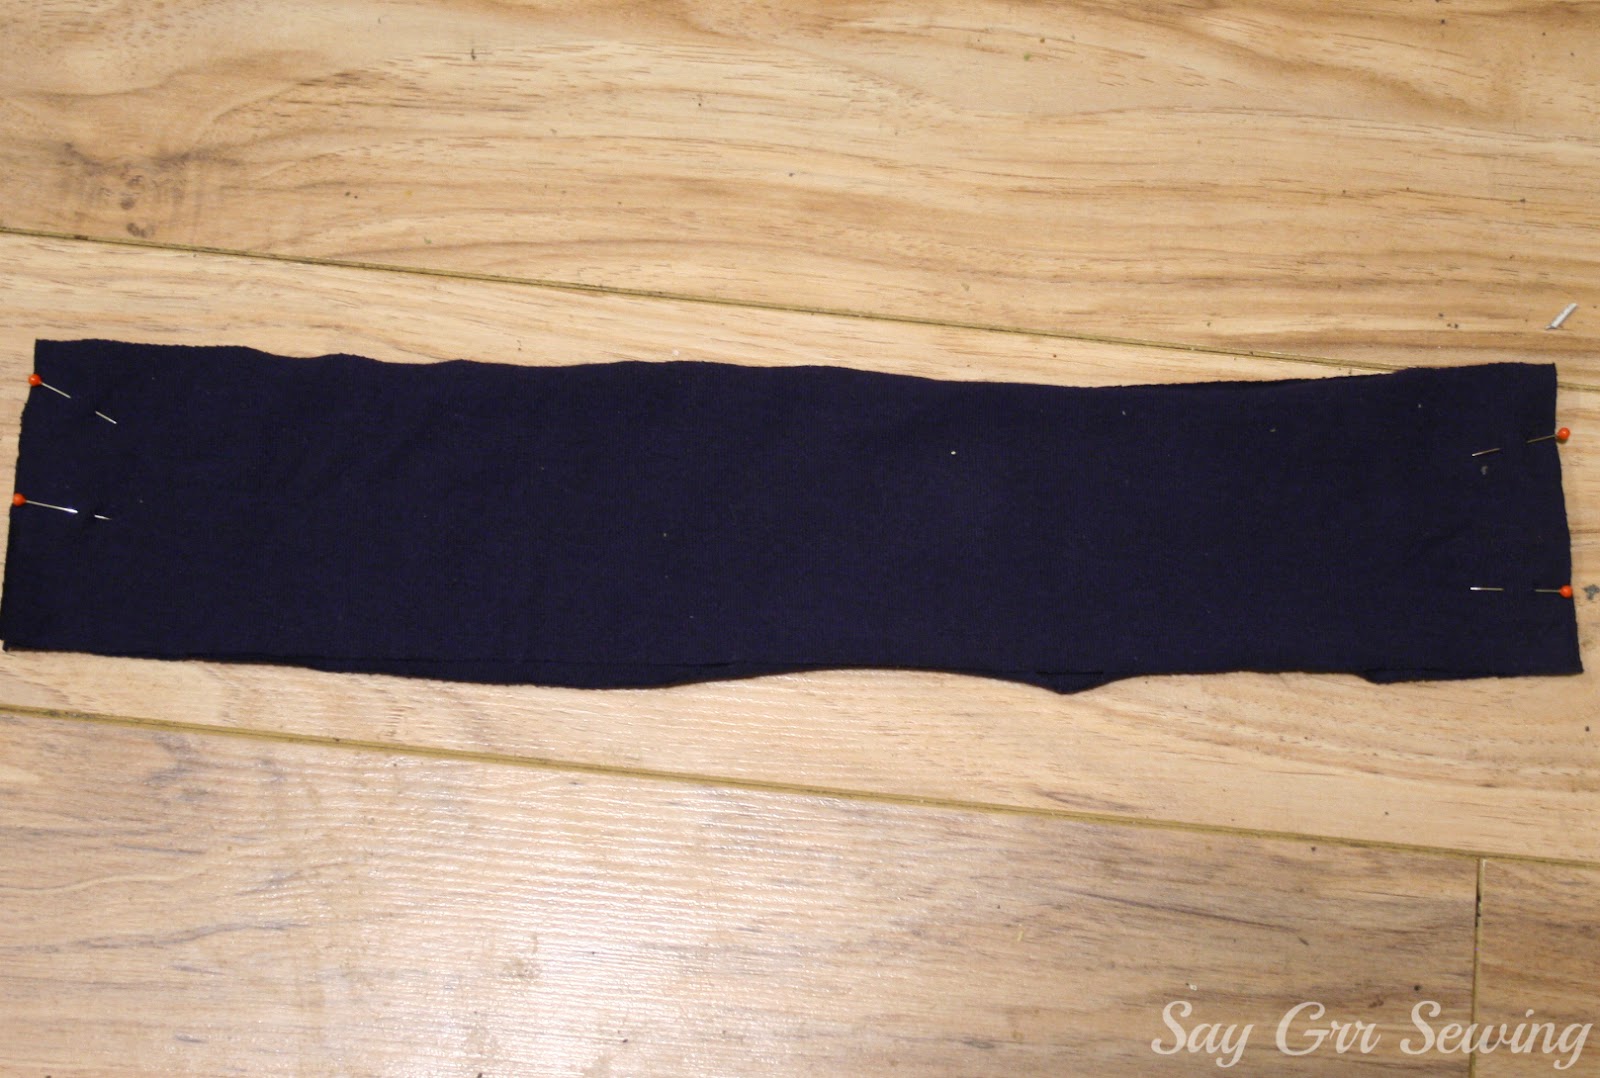
Once your nursing openings are finished, you can move on to the cuffs. Lay two cuff pieces right sides together. On one short side, mark an inch out from the center in each direction:

Sew the entire other short edge together, but just sew outside the marks on this edge. Be as precise as possible. I trimmed the left edge on this cuff, but it works better to just press it open.

Now this is the trickiest part of the entire dress... pinch the cuff on that short edge at the center mark, just grabbing one layer, and fold everything else away from it. Here I'm holding the rest of the layers slightly apart so you can see a little better- toward the bottom is the part that is pinched.

Sew down the pinched seam just until you meet your mark. Again, be as precise as possible. (This is flipped upside down from the last picture.)

Now fold everything the other way and sew the other side, and you should have something like this:

Trim the corners off the folded pieces just outside the stitching so your corners will be crisp:

Open this piece out so you have a single-layered tube with some odd folding in the middle:

Fold it wrong sides together:

And push out your points:

Repeat for your other cuff. Now slide them onto your right-side-out sleeve, matching the side without the slit to your back seam, and matching raw edges. Pin just the inner layer of the cuff to the sleeve:

And sew it with a stretch stitch:

Fold the un-sewn layer of the cuff in 1/4 inch and press, then topstitch just above the cuff with a twin needle. No pictures.
Now the waistbands... stack the waistbands with two right side up, then two right side down on top of those, and sew the short side seams:
Pin the skirt inside the waistbands, right sides together, matching side seams, and with two waistbands on each side. You need the extra thickness of the waistbands to help hold up the skirt, since it is quite heavy.

Sew with a stretch stitch, fold the waistband up, and press:

Now for some marking. Measure 2 inches the lower front seam of each front bodice overlap, and mark it with a pin. Measure 3 inches from that, mark, 4 more inches and mark:


Now turn the skirt and waistbands wrong side out, and stick the bodice down inside the skirt until the raw edges of the bodice and waistbands match up, also matching side seams. Pin together and sew with a stretch stitch. No picture.
When you turn the dress right side out, it should look like this:

Press all the seams toward the waistband and topstitch with a twin needle:

Finally, press your skirt hem to the inside 1 inch and press, then topstitch it down with the twin needle. Now go try on your new dress! (Okay, I actually recommend letting the dress hang for a day or so before hemming it, and trimming it to be level first, since parts of it will definitely stretch out.)
A few more pictures to entice you to go make your own:


 |
| I love this dress with boots and a belt! |


 |
| I have no idea why I have a dent in my elbow. I didn't even know it was there until I saw this picture. |
To see the original crossover nursing dress, go here.
For creating your own pattern for this dress, go here.
Thanks for stopping by!

Linking up at The Train To Crazy