

It's about time- I bought the material for it last year! I originally planned to make this for my sweet cousin's baby, who was born in January. Unfortunately, my slow progress (I didn't actually cut the dress out until about May...) and her rapid growth means that it probably won't fit her now.

I put off smocking it for a long time because the pleating-by-hand process is a bit tedious, and I was hoping to obtain a pleater. I finally hand-pleated it, but in the meantime, I tatted some lace for the sleeves! I didn't end up using it in the final gown, because I'd tatted it in size 10 thread and it was just too heavy for this. I'll find somewhere else to use it though.

I also sewed up a slip to go underneath it! This was from a pattern the lovely Karen sent me, and I sewed it up in the same material as the gown... white Imperial batiste.

The slip pattern included this dainty embroidery design, which I decided to do in all-white. The embroidery floss I used caused some problems... it kept shredding! I think I'll stick with DMC thread next time.

I usually slip-stitch everything, but this pattern mentioned using a whip-stitch for the hem and bindings, so I tried it out. I like it, it's quick and almost invisible! Here are the results on the outside:

And on the inside:

I bought some teeny-tiny 5mm buttons to use on the shoulders... it was either that or use some 5/8" ones, as that was the next size I had as far as cams for my buttonholer!

The back of the slip is just plain:

I like the slip, but I'd make some changes to the pattern if I were to use it again... I'd narrow the shoulder, deepen the armscye, and true the seams. Here it is on Foof... it's meant for a smaller baby, but you can see that the shoulders are a bit wide even on her:

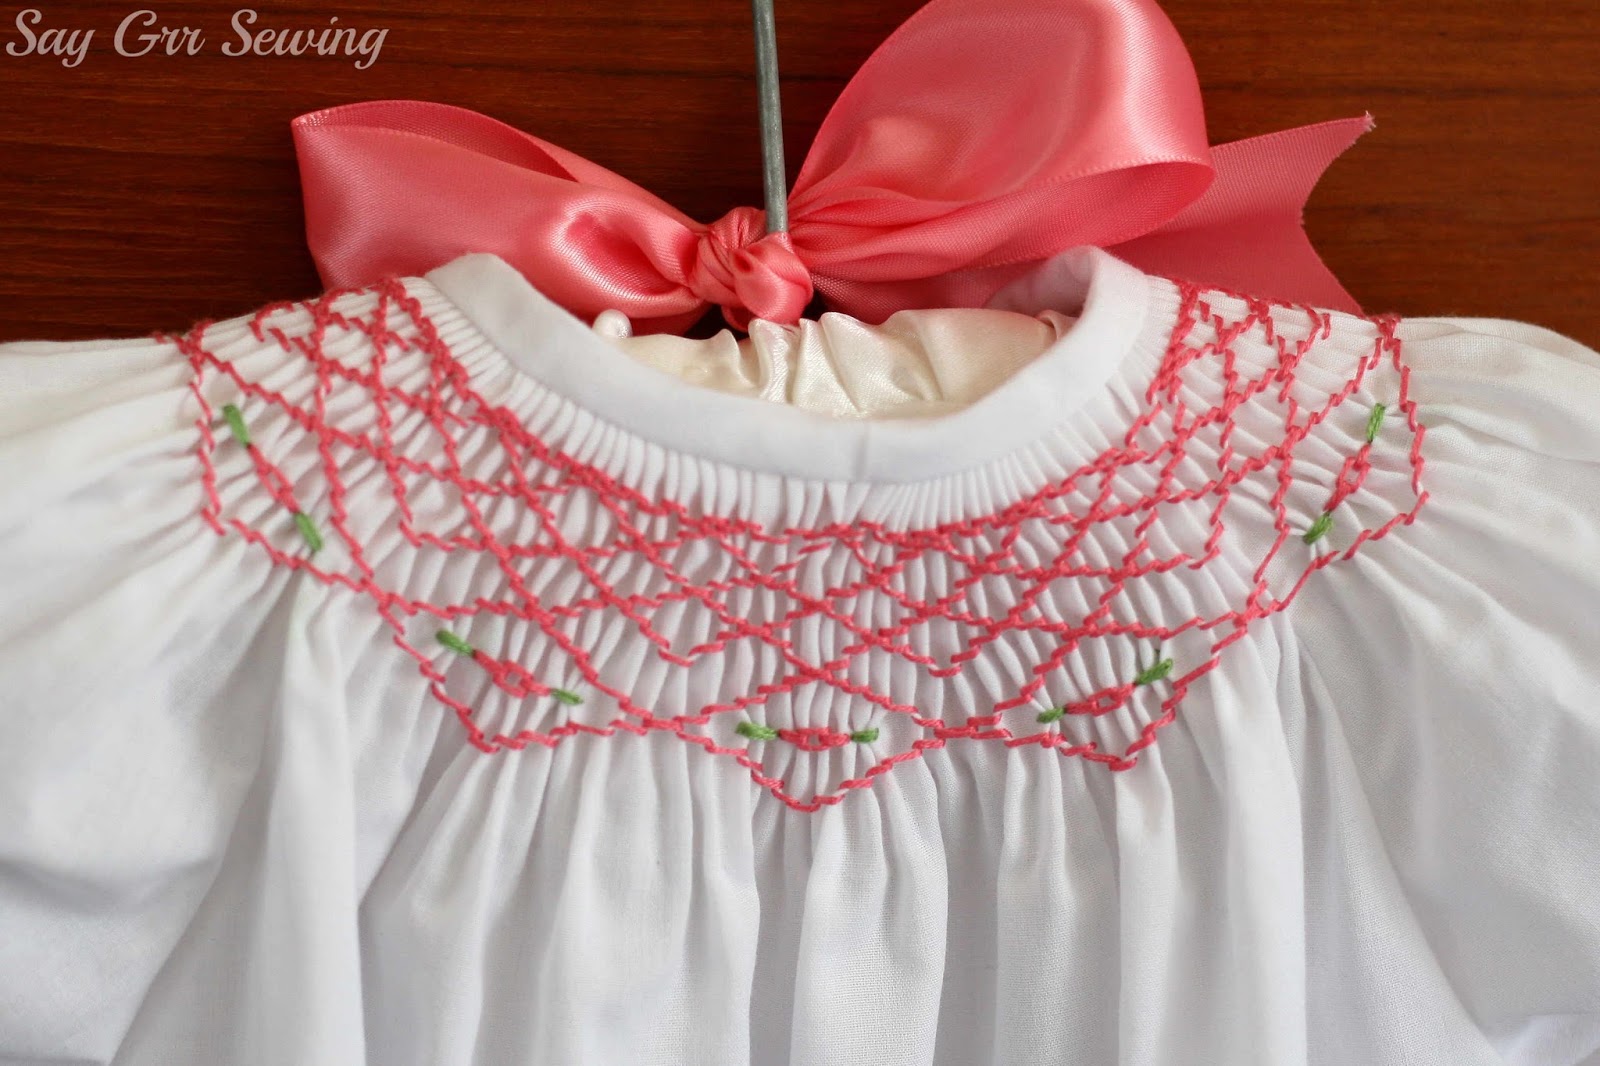
Then it was back to procrastinating on the baby gown for a while! ;-) Once I got to the smocking it didn't take too long though... and I love how it looks!

This is the Children's Corner Missy, which is a single-size, newborn-to-18lb, pattern. It includes one smocking plate:
As well as the embroidery design. I ended up buying another buttonholer just to get the cam size I needed for this... so now I can use 1/2" or 3/8" buttons!

The seams aren't trued on this... for the most part that didn't cause a problem, except at that 2" deep hem! Since the side seams are angled, but the hem is straight, there was a lot of fabric near the seams that I just couldn't ease in. I finally re-sewed that section, taking the excess out of the hem, before hand-hemming with a slip-stitch.

I'd planned to use a hemstitch needle for this, but I'm still using a vintage machine, and it doesn't have any stitches that worked to make the hemstitching look the way I wanted, even after heavily starching the fabric. (I sort-of-repaired my newer machine, but it still doesn't feed properly for a lot of the stitches... I should really just take it in and get it fixed properly.) So hand-hemming it was!

The sleeves have a hand-sewn narrow rolled hem, but it isn't as narrow as it's supposed to be because I mistakenly pressed up 1/4" instead of 1/8". It's still pretty dainty though, I'd love to see what it looks like done properly!

There's a bit of smocking on the sleeves too:

Foof is 19lbs now, so I didn't expect it to fit her, but it does!

And was she ever delighted when she looked in the mirror!

She thought she was adorable, and I agree with that assessment!

I used the daygown length of the pattern, so it's still plenty long enough.

I used DMC floss for this, and it worked much better than whatever it was that I used on the slip.

I'd make this pattern again, but I'd take care of that hem angle before it came time to hem!

After all, it's pretty darling!

Vintage-style garments really suit this little girl too.

I thought it was interesting that the binding around the neckline has to be stretched to fit... but a good idea, so the neckline doesn't end up too large!

I don't love that stitching the first pass on the binding made the pleats look a bit wobbly. Next time I'll try basting it, or maybe use wash-away wonder-tape.

I had a tough time narrowing these photos down to a semi-reasonable amount!

And that's in spite of the fact that she's at a tough age for photos...

She doesn't quite understand (or isn't willing to do) what I want her to do, and just wants to be active!

Anyway, I'm really happy with this dress, and it was worth the time I spent on it!

Thanks for stopping by,


