Thursday, January 29, 2015

Snowflake Florence Blouse and Tulle Skirt

  Back in November, SarahLynn, one of the lovely Shaffer Sisters, posted this darling outfit on their blog. The jacket was impressive, and the headband darling, but what really got my attention was the beautiful snowflake fabric the dress was made from.

  After asking where the fabric was from, I visited a Walmart and picked up 3 yards. I didn't have any concrete plans for it... something for the daughters, maybe, so I bought enough for pretty much anything I could make for any of the girls, or enough for a blouse for me. I washed it, then left it in my sewing room while working on Christmas gifts, admiring it every now and then.

  And suddenly, inspiration struck. Not one dress for one daughter.... 3 outfits, one for each. I chose my patterns, drew pictures to determine layout, and headed back to buy a few more yards of the snowflake fabric... but it was gone. So I added some solid navy and grey, along with tulle, and decided on a new layout. This is the outfit I made for Booper.

  In addition to being inspired by SarahLynn's fabric choice, I really loved how Sarah of The Crazy Tailor paired the Florence blouse with a full skirt, so I mimicked that in designing this outfit.

  First, the shirt! This is the Florence Blouse, by Made-It Patterns. Based on the measurement chart, Booper was in a size 4 with a 5 length. Since Booper is developing shoulders like mine, I also went with a size 5 in the upper chest. The fit is very good, a tiny bit shorter than I expected based on the pattern photos, but overall pretty close. The sleeves are the right length when Booper's arms are down, and the shoulders and collar are fitted but comfortable.

  The pattern instructions were very good, and the pieces fit together beautifully. The notches all matched, with one exception-the sleeve notches. However, until I've made another I can't be sure if I flubbed it when I made the shoulders a size 5 and bodice a size 4... I can't even remember if I cut the sleeves a straight 5 or partially a 4, so there's a good possibility the mismatch is my fault here. Luckily, it was an easy fix by just adjusting the gathering.

  I like that the mandarin collar and button placket are sewn using the classic method... I wish the cuffs had a proper placket too. I did not top-stitch around the upper portion of the collar, because I thought I was almost out of dark blue thread. (I discovered I had 4 serger cones of it later on. Oops). Also, the rest of my top-stitching is not that great... I had the presser foot pressure too high and it kept twisting the fabric under the foot. It took me until after the plackets were done to figure out what was going wrong, and since I thought I was almost out of matching thread, I didn't unpick it.

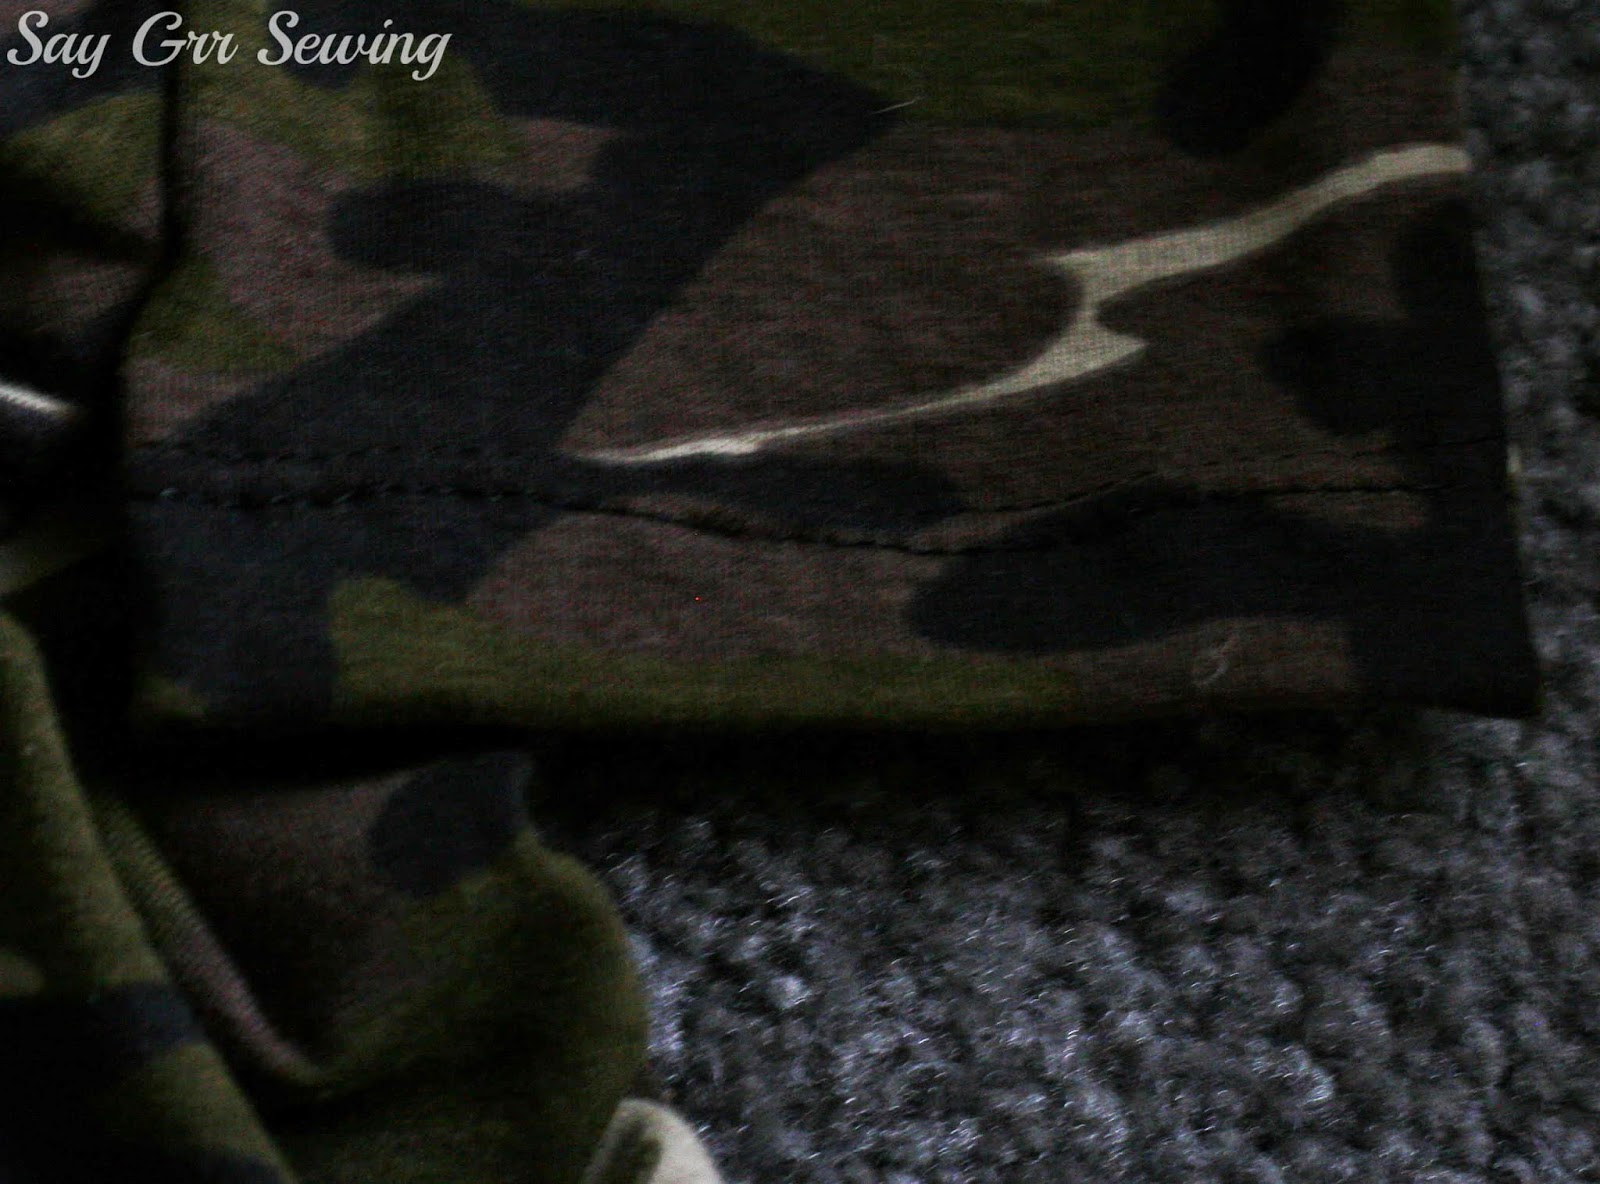
  The flounce on the front is sewn in an unusual manner... the raw edges are pressed toward the right side of the fabric, and the trim top-stitched on top of them. It looks neatly finished on both the back and front, but I can't help but wonder if it will fray out from under the trim after a few washes.

  The back yoke is sewn very nicely, and neatly finished on the inside.

  I was worried that the point of the yoke would be difficult, but it really wasn't, and it didn't pucker at all (until I washed it, which is when these flat photos were taken).

  Other than the yoke, collar, and placket, all of the seams are just serged. I'd prefer them to be flat-felled, but I appreciate that the instructions mentioned when to finish each seam. Overall, I would recommend this pattern.

  I was planning on proper buttonholes and buttons, and had a nice set of buttons all ready to go... but when I pulled out my vintage buttonholer, the closest cams were either quite a bit too small or quite a bit too large. I tested it anyway, on some scraps, but the buttons either popped right out or couldn't go through the hole. This was the Friday before Christmas... and this shirt was supposed to be done by Christmas morning! I looked for a cam in the right size first, but I only found one on a random site that I didn't quite trust. Instead, I sent a convo to this Etsy shop about a rush order of the silver heart snaps... and yay, they were willing to go for it! I also ordered a set of round grey snaps from Amazon with two-day shipping as back-up, but I didn't need to. The silver heart snaps arrived in time, and looked great with the fabric. =)

  Now for the skirt. This skirt was.... difficult. I should have paid more attention and either used Stef's tutorial, or this free pattern from Oliver+S. But I stupidly decided to wing it, and ended up unpicking several yards of tulle and really hating the whole process. I had a hard time keeping the tulle straight when cutting... pre-washing it wrinkled it and ironing it didn't get the wrinkles out. It turned out okay, but it bunches up like crazy when it's moved in, and sadly, Booper has torn it in about 4 spots already. =( That and the cutting and bunching problems are why the hem is so un-even here.

  I'm not really happy with the end skirt, but it still looked cute with the shirt, and Booper was delighted with it.

  And at least I took the time to make it comfortable, with a lining and covered waistband! =)

  That's it for this outfit! Back soon with what I sewed for Gaiw. =)
Thanks for stopping by,

Thursday, January 22, 2015

Christmas 2014: Map Skirt

  This skirt turned out perfect for the recipient. I made this for my youngest sister-in-love... a talkative, adventurous young lady with strong preferences. With her yearning for travel, love of history, and penchant for book-reading, vintage-style map fabric was exactly what I needed. I searched all over the place for a map fabric that was the right style, but didn't cost $20 a yard, and finally found one here.

  Isn't that fabric great? I initially decided to make a simple gathered skirt, so I only bought 2 yards of the fabric. However, the more I thought about it, the less I wanted a gathered one. Instead, I took some measurements from a skirt this sister-in-love left at my house (conveniently for me, I might add), and drafted a paneled circle skirt. But a knee length circle-skirt for a tall young lady requires a good bit more fabric than 2 yards, especially when it's only 44" wide! So I narrowed the panels quite a bit and ended up with something that's just a bit wider than a half-circle:

  I made it with 6 panels, a simple lined yoke, and an invisible zipper in the side seam. The seams are serged on the inside due to time constraints, and I stitched in the ditch on the outside to catch the yoke lining... which turned out really well! The best stitching-in-the-ditch I've ever done, in fact. =)

  For the hem, I stitched with a basting stitch at 3/4", folded it up along the stitching, then tucked the raw edge underneath and stitched again. Adding the first row of stitching made it much, much easier to turn and press the hem. I did un-pick that row after taking these photos. ;-)

  I didn't quite manage to line the invisible zipper up at the bottom of the yoke, but since I still had 8 gifts left to make, I decided to leave it.

  It fit her perfectly! And sat comfortably below her waist, exactly where I hoped it would. =)

  I'm really, really happy with how this one turned out. =)

  I just have a few more posts to wrap up the Christmas gifts I made, then I'll move on to some things I sewed more recently!
Thanks for stopping by,

Monday, January 19, 2015

Christmas 2014: Knit Shirts

  I've already shown you the shirts I bought and decorated, and now for the shirts I actually sewed!

  First up, for my pregnant sister-in-law. (Actually, all three of my sisters-in-law are pregnant right now. I'm the only married sister my family and my husband's family that is not pregnant.) This is the one who married my brother in 2013. =)

  Jess is an outdoorsy, animal-loving, quiet person. She loves camouflage, but I've also spotted her wearing sequins. =) Since I wasn't sure how often sequins would get worn, I chose camouflage knit for her shirt, the same fabric I used for my youngest sister's skirt, from Girl Charlee.

  I started with Jalie 2805 (which includes 27 sizes... from toddlers to women's plus!) and chose the jewel neck and long sleeve options. The pattern was pretty good, all of the pieces matched up and the the notches lined up perfectly. The instructions were sparse, but that's not a problem for me. There were a couple of slight dips/points at corners, but small enough that they caused no problems. I lengthened and widened the front bodice below the waist to accommodate a growing belly, and gathered the sides of the front piece to match the back. You can see the shaping a bit here:

  I added a ruffle at the neckline to girly it up a bit... it's just a long piece with one rounded end, lettuce-edged all around and gathered to half its length, then zig-zagged down, before adding the neck binding.

  The hem is also lettuce-edged:

  And the sleeves are hemmed with a twin needle:

  Since Jess is not due until July, the belly of the shirt is a bit loose right now, but otherwise it fits her well, and I really like how it turned out. =)

  Next, for my mom, I sewed a shirt using the same pattern, Jalie 2805. I chose the 3/4 length sleeves for her, and started with the jewel neck but altered it for a pretty flounced neckline. I did a cheater FBA on hers, but she said it was still a bit tight in the chest. I  used this fabric from Girl Charlee for hers... it was rather see-through, so I lined the entire bodice with an off-white knit that I happened to have. The print was also quite a lot bigger than I expected, but it still looked all right for this shirt.

  The flounce and hem are lettuce edged:

  The sleeves... I actually can't remember if I hemmed them with a twin needle or lettuce-edged them, and I didn't get a photo of those. But here's the hem:

  Anyway, mom liked it! So that's a win. =)

  Finally, I made a shirt from the same pattern for this sister-in-love, who- as mentioned above- is pregnant. She's an artist, graceful and feminine, so I used a pretty rosey pink stretch lace and under-lined it with white knit, both from Girl Charlee. Sadly, the stretch lace is no longer available. 

  I chose the v-neck and 3/4 length sleeve options for this one. I did a cheater FBA, cut the waist in a curve, dipping down in the back and up in the front, and flared the cut pieces into a full circle for plenty of room in the belly, with a little extra length in the front to reduce risk of exposure.

  After sewing it up, I let it hang for a couple of days and evened the hem before lettuce-edging it. The lettuce edging comes out really sparse on a lace like this, so next time I'll probably hem it using this method.

  I hemmed the sleeves with a twin needle, after serging them to keep the layers together:

  Now for the sad part. This one didn't fit. In fact, it was too tight to the point of being unwearable. =( I should have sized up to account for the lack of stretch in the stretch lace (as in, it stretches, but not nearly as much as the pattern recommends), and I think I also made a mistake in the FBA.... the sleeves and the chest were the parts that were too tight. =( I could probably add a gusset from the sleeve hem to the waist, and I have enough leftover fabric to do so... I just need to get the shirt back in my hands. It was extra disappointing that I messed this one up, because I was really, really happy with how it turned out.

  Maybe I'll make her another maternity shirt with some pretty knit, to make up for this one being too small. Ah, well. 

  Anyway, that's it for the knit shirts I sewed! =)

Thanks for stopping by,

Friday, January 16, 2015

Christmas 2014: Pampering Gifts

  There was one person on my gifting list that I wanted to sew something for, but I couldn't find a fabric that was perfect for her. So instead, I began the gift with something she had once mentioned wanting, and built from there.

  That was my mother-in-love, and the base of the gift was a pretty washcloth. I knit a square (well, almost a square. After I'd bound off I realized it was a little shorter than it had looked on the needles) of seed-stitch and decided to do a crochet edging. That was harder than it sounded... I tried 3 different  trims and wasn't happy with any of them. I finally settled on a basic chain stitch loop for my 4th attempt, and liked it just well enough to keep it, though it still wasn't what I'd initially pictured.

  I used Martha Stewart cotton hemp yarn in (I think) flour sack white. I bought it over a year ago on Zulily, but the same yarn can be bought here. It was pretty nice to work with, non-squeaky and much softer than the cheap yarns I usually use, but it did split really easily. It's perfect for a washcloth though, very absorbent and shows texture really well. (No, I did not block the washcloth. I should have. I was just kind of tired of it after frogging the trim 3 times.)

  Since a washcloth alone isn't much of a gift, I made some pretty scented bath products to go with it.  First, I made a basic lip balm- 1 TBSP shaved beeswax, 2 TBSP shaved cocoa butter, 1TBSP liquid oil, and a few drops essential oil. I had some wonderful jojoba oil with vanilla CO2 in it, so I used about a half-teaspoon of that and filled the rest of my tablespoon measure up with almond oil for the scent... then added a single drop of rose absolute. It smelled gorgeous, and made about 5 tubes of lip balm, which turned out to be a good thing even though I thought I'd only need one. Having used this recipe to make lip balm for myself, I'd reduce the liquid oil to 2.5 tsp next time, as it's a bit soft.

  Next, I made some whipped body butter. I started with this recipe for the directions and quantities, and ended up going with 2TBSP shaved cocoa butter, 2 TBSP mango butter, 2 TBSP coconut oil, 2 TBSP almond oil with a tiny bit of the vanilla-jojoba blend mixed in, and a couple drops of rose absolute. It was a bit tricky to get the timing right for whipping it, and it still wasn't as fluffy as I expected, but it turned out nicely in the end. It was just barely enough for a half-cup size canning jar, so I'd make a bit more next time.

  Next, I mixed up a sugar scrub based on this recipe. I left out the vanilla extract and vitamin E oil, and used the same almond-jojoba-vanilla mix as I did with the other recipes, added a couple drops of rose absolute, and made a half-batch. I think I would have liked the texture better without the honey, but it did smell beautiful. 

  The last bath product was some simple bath salts. These were just 1/2 cup of Epsom salts with 2.5 tsp baking soda, a few drops of vanilla-jojoba oil and rose absolute for scent, mixed together. This one turned out just right. =)

  Finally to pull it all together, I made some pretty labels in Illustrator and printed them out on full-sheet label paper (because that's what I had). The labels are actually my favorite part... they came out just like I wanted. =) You can download the labels here, although I can't imagine that all that many people are making chocolate-vanilla-rose-scented bath products. ;-)

  I made another pampering sort of gift for my sister-in-law... a teacup candle. =) There's a pretty good chance you've seen teacup candles on Pinterest! I first saw the idea here. I bought this beautiful cup (affiliate link- it was much cheaper when I bought it), melted some soy wax (affiliate link) with lemon essential oil, and poured it in over a wick (affiliate link). I let it cool.... and was very disappointed in the results.

  The wax pulled away from the edges and cracked all over as it cooled (and it looked a whole lot worse than that photo, above)... at first I thought it was because the essential oil, but after troubleshooting online it turns out I overheated the wax... it was supposed to be poured at a much cooler temperature. To fix it, I melted and scented just a bit more wax, let it cool a bit, and poured it on top. It worked! Well, it was still a little too warm and pulled away from the edges, but it didn't crack. =) And it looked really pretty.

  I kind of wanted to keep it for myself, even though I use candles once in a blue moon.


  I'm not sure if it exactly falls into the category of pampering, but for each family I made canned goods. Since I canned some of these in the summer, I suppose you could say that I started making Christmas gifts in July. ;-) Anyway, the families with bigger/more kids received half-pint jars:

  And the slightly smaller families received half-cup jars. =)

  In case you can't read my writing, they are, from left to right, apple butter, blueberry jelly, pear preserves, and cherry jam. 

  The blueberry and cherry are adapted from the sure-jell pectin recipes, the pear preserves (okay, jam... but I wanted them all to have different names, and it's still technically correct) can be found here, and the apple butter is apples, peeled, cored, and chopped, thrown in the crockpot with a tiny bit of apple juice so they wouldn't scorch, sprinkled with cinnamon, cloves, and nutmeg (no idea on the measurements, I just sprinkled till it looked like enough) and sweetened with a tiny bit of sugar, then cooked for about 3/4 of a day until they turned into apple butter. =) Then canned. 

  These all taste amazing, by the way... especially those pear preserves, even though they are a bit too sweet. Next time I'll make at least double as much of each so there will be more for my family. =)

Thanks for stopping by,

Sunday, January 11, 2015

Syrah Times Six

  This is currently my favorite skirt pattern.

  It's really comfortable, really flattering, and pretty quick to make.

  As evidenced by the fact that I've made 6 of them. =)

  I'm not normally a make-multiple-copies-of-the-same-pattern kind of seamstress, but I ended up a tester for this pattern right when I was feeling a lack of skirts in my wardrobe.

  I made 4 while testing different waistband variations, and I love and have worn 3 of them near-constantly since. The first, this black one, had some issues. First, I'm about 3 inches taller than the pattern is designed for. (I'm just under 5' 9") so it wasn't as long as it was supposed to be. Second, the waistband had some dipping and bulk issues with the ruching at the sides, and third, the lining was also quite short on me... and since it was above my knees it rode up even higher when I walked. Since I'd used a burnout knit I found in Joann's for this one, it really wasn't modest with that short lining. The knit also pilled really quickly.

  For my second version, I lengthened the skirt 3 inches following the pattern instructions, used the main pattern for the lining, and sewed it up in stretch lace from the clearance section of Joann's. I didn't make any waistband changes, but I love how this one turned out!

  Unfortunately, after a couple washings a bunch of stretchy strings appeared all over the surface of the fabric. I think it's a really low-quality fabric, but it was really disappointing. I clipped most of the strings off, and I still wear it, but it's a bit hairy-looking and a lot less pretty than it was to begin with.

  For version number 3, I used the revised waistband Lauren had created, and it definitely worked better than the first. It wasn't as bulky and it didn't dip at the sides nearly as much. This fabric is from Joann's, and seemed really nice at first, but it did pill a whole lot. Luckily the pilling isn't noticeable. I think this is the one I wear the very most. =)

  Version 4 was also for me, from a thin grey knit, also from Joann's. I've worn this one quite a bit. I used the flat waistband option for this one. I really love the ruched version, but I rarely tuck my shirts in, so the flat version ended working better for me.  I noticed a few days ago that this one is developing a lot of tiny holes though... so my suggestion to you is Don't Buy Knits at Joann's. The quality is just horrible.

  Anyway! Since I loved the skirt pattern so much in spite of the cheap fabrics I used, I knew my sisters would love it too. For my youngest sister, who is a delightful mix of tree-climbing fun and lady-like manners, I made this really fun camouflage skirt, using this cotton/spandex knit from Girl Charlee. She loved it, and it suited her personality perfectly.

  Since she is tall like me, I lengthened the skirt and made the lining just longer than knee-length.

  For my other, very stylish, Pinterest-loving, sister, I made this one with alternating stripes, also using Girl Charlee fabrics. This one is a bamboo/poly/lycra blend, which was interesting. It's super soft and drapey, but as you can see it bubbles between the stripes when it hangs. It was important that the fabric had 4-war stretch though. I love how this one turned out! This one is also lined, with added length.

  Basically, I traced the pattern as a whole piece, instead of one to cut on the fold, cut it apart at an angle in two places, added seam allowances to either side of each cut, and placed the resulting pieces at different angles on the fabric to cut. A bonus was not having to match the stripes, which would have been very difficult in this extra-stretchy fabric. This skirt was also much appreciated. =) Both skirts have a lettuce-edged hem, as do 3 of the ones I made for myself. =)


  I also used the flat waistband for both of them, partly because I wasn't sure whether they usually tuck their shirts or not, and partly because it was faster, and I had 22 other gifts to make . Here's a closer view of the ruched waistband on my lace version:

  Pretty, isn't it? I love that the center front and back of the waistband is flat, as is the interior of the waistband.... only the outer sides are ruched.

  The sizing and measurements on this pattern match up really well. The skirts I made for my sisters fit perfectly based on nothing more than a waist measurement (My mom actually gave me the hip measurements too, but this skirt has enough ease through the hips that it doesn't factor into the sizing). Oh, and that's one more thing I love about this pattern... it's not tight on my hips and behind!

  If you are interested, the pattern is available here.... but if you'd like to figure it out yourself, other than the ruched waistband it's a pretty basic long a-line with a shaped yoga waistband. The ruched waistband would be harder to draft though.

Thanks for stopping by,