Here's my initial sketch:

For this outfit, I made a little dress:

A diaper cover:

A cardigan:

A hat:

And some shoes:

I used Girl Charlee's faux leather (I refuse to call it vegan leather- that's just too pretentious) for the shoes, since the vintage machine I'm using won't sew real leather. It can't top-stitch on this fake stuff either unless I smear oil on the pleather, but it sews decently from the wrong side without skipping every stitch!

I altered a pattern I drafted for Foofy's tiny feet a while ago... she'll be 5 months old tomorrow and just now fits newborn-sized shoes! The pattern I drafted is actually part of some footed tights that I haven't posted about yet, so I connected several of the pieces for this and added scallops to the opening.

The buckle is closed with a snap, but this faux leather is so thin and delicate that even with interfacing under the snaps I can't open them back up without tearing it... luckily it's also stretchy, so I can slip the shoes on and off anyway.

I kept these super-simple and didn't line or interface anywhere except the snaps, so they are very lightweight and dainty.

The hat is a simple beret, with the brim made from scraps of this shirt,

The rest of the hat is made with mustard ponte knit, bought in 2014 from Girl Charlee.

The cardigan is made using the same mustard ponte. I started with Peekaboo Pattern Shop's Play Date V-Neck shirt in size 6 months and modified it. (This is not a pattern I recommend. I just used it because I already had it.) I deepened the neckline just a tiny bit, created a front opening, cropped it, and added a slight overlap to the front. I also left off the sleeve cuffs, and hemmed the sleeves at 1", which made them just the right length for Foof.

I made facing pieces for the neckline and front opening, and mitered the connection to the hem:

I sewed the facing down with a scalloped stitch and purple thread on my sewing machine:

The scallop goes all the way around, so it adds some detail to the back too.

I would have preferred to fold the raw edge of the facing under, but my machine was already balking at the seams, so I just left it. It's not pretty, but at least it won't fray.

The sleeves are also hemmed with the scallop stitch:

I added a purple KAM snap for the closure... it's not the right shade of purple, but it's closer than anything else I had.

This cardigan turned out just like I hoped it would, and I'm pretty happy with the mitered corners! =)

The diaper cover is made using Dana's free pattern in the 0-3 month size. This was my first time using this pattern, and I will definitely be using it again. It looked huge while I was sewing it but all the elastic shrank it down to just the right size!

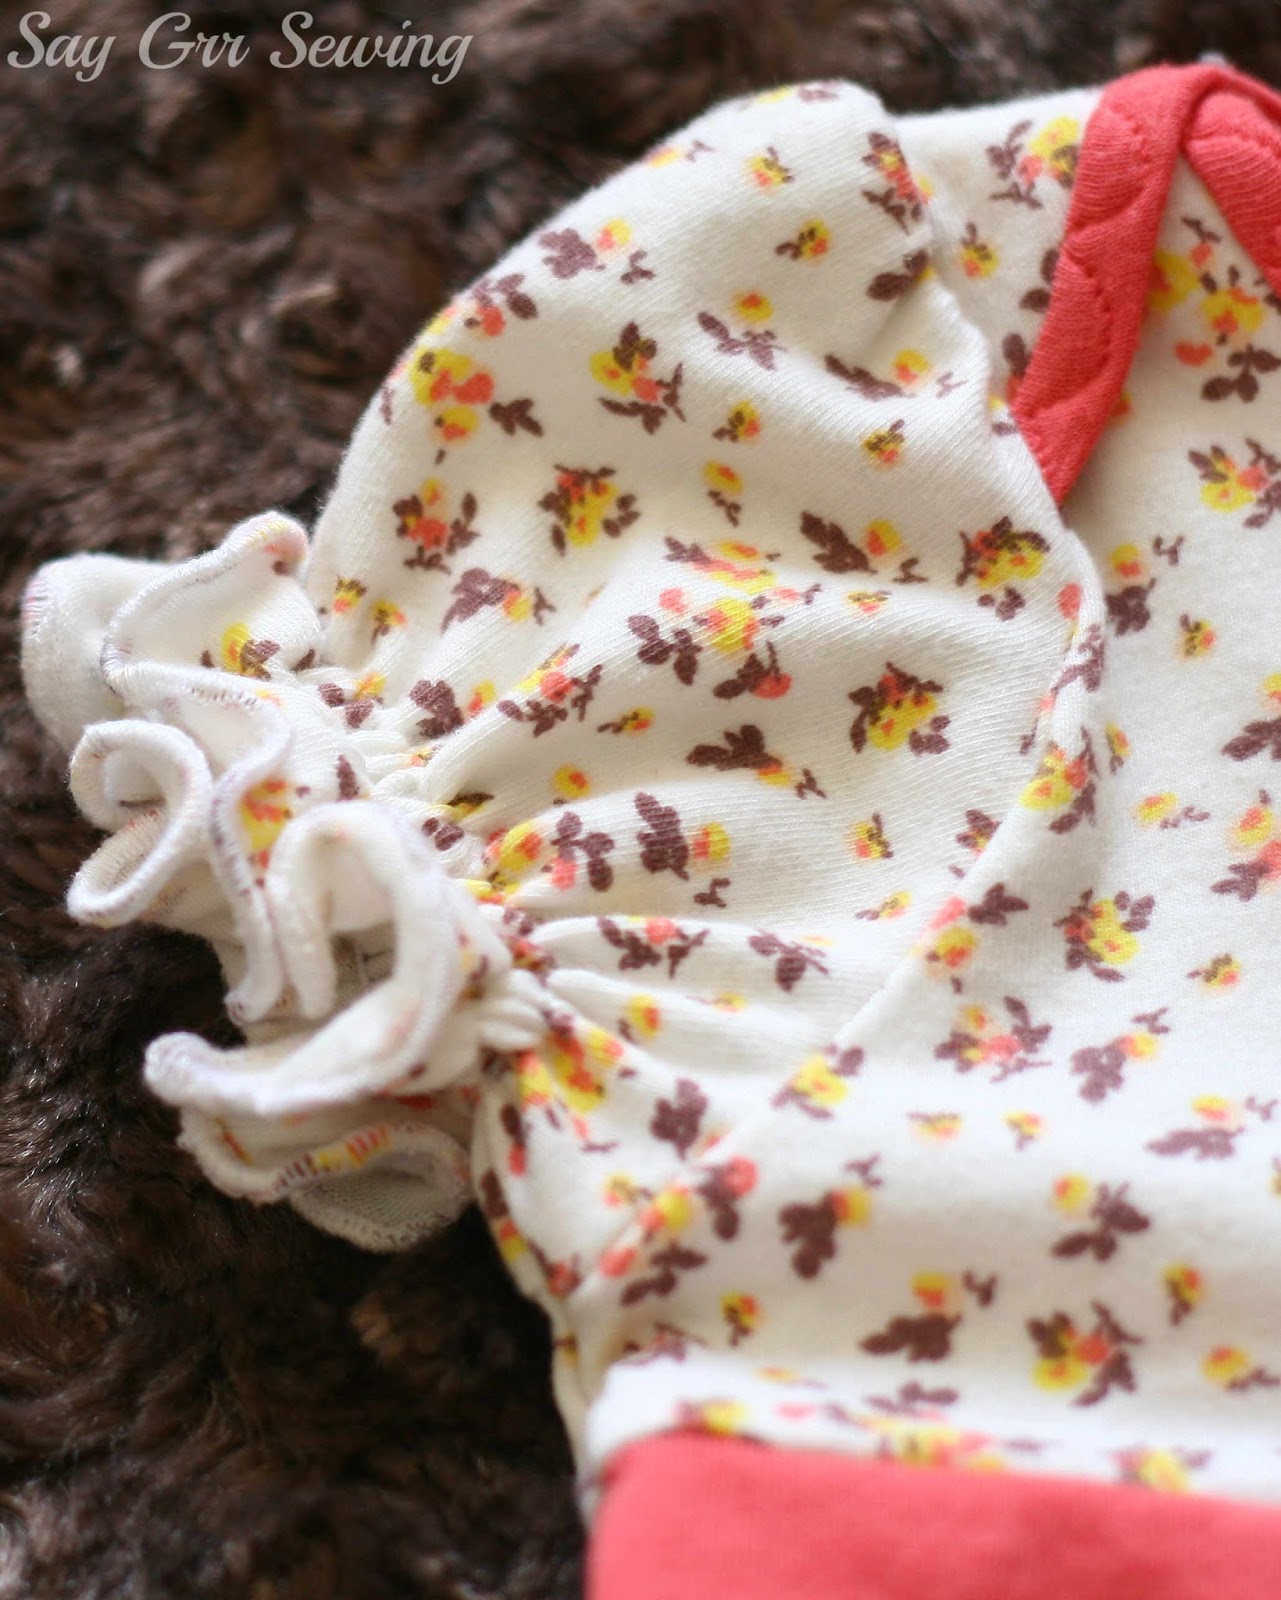
I finished the raw edge of the legs with a lettuce-edge hem instead of folding them under, and shirred the openings with elastic thread to make the cute ruffles:

I used slightly wider elastic at the waist than called for, but kept the casing the same size because I was using knit with 4-way stretch.

Speaking of which, this knit is also from Girl Charlee (are you seeing a pattern here?)- this coral, and also bought in 2014.

The dress started out as Brindille and Twig's basic bodysuit pattern in size 0-3 months. (I don't recommend this pattern either.) I added width to the sleeves to create a puff sleeve, cropped the bodysuit to just above Foof's waist, then added a waistband and a circle skirt.

I bound the neckline with some more of that coral knit and the same scalloped stitch I used on the cardigan.

The sleeves are lettuce-edged and shirred:
The hem is also lettuce-edged. =)
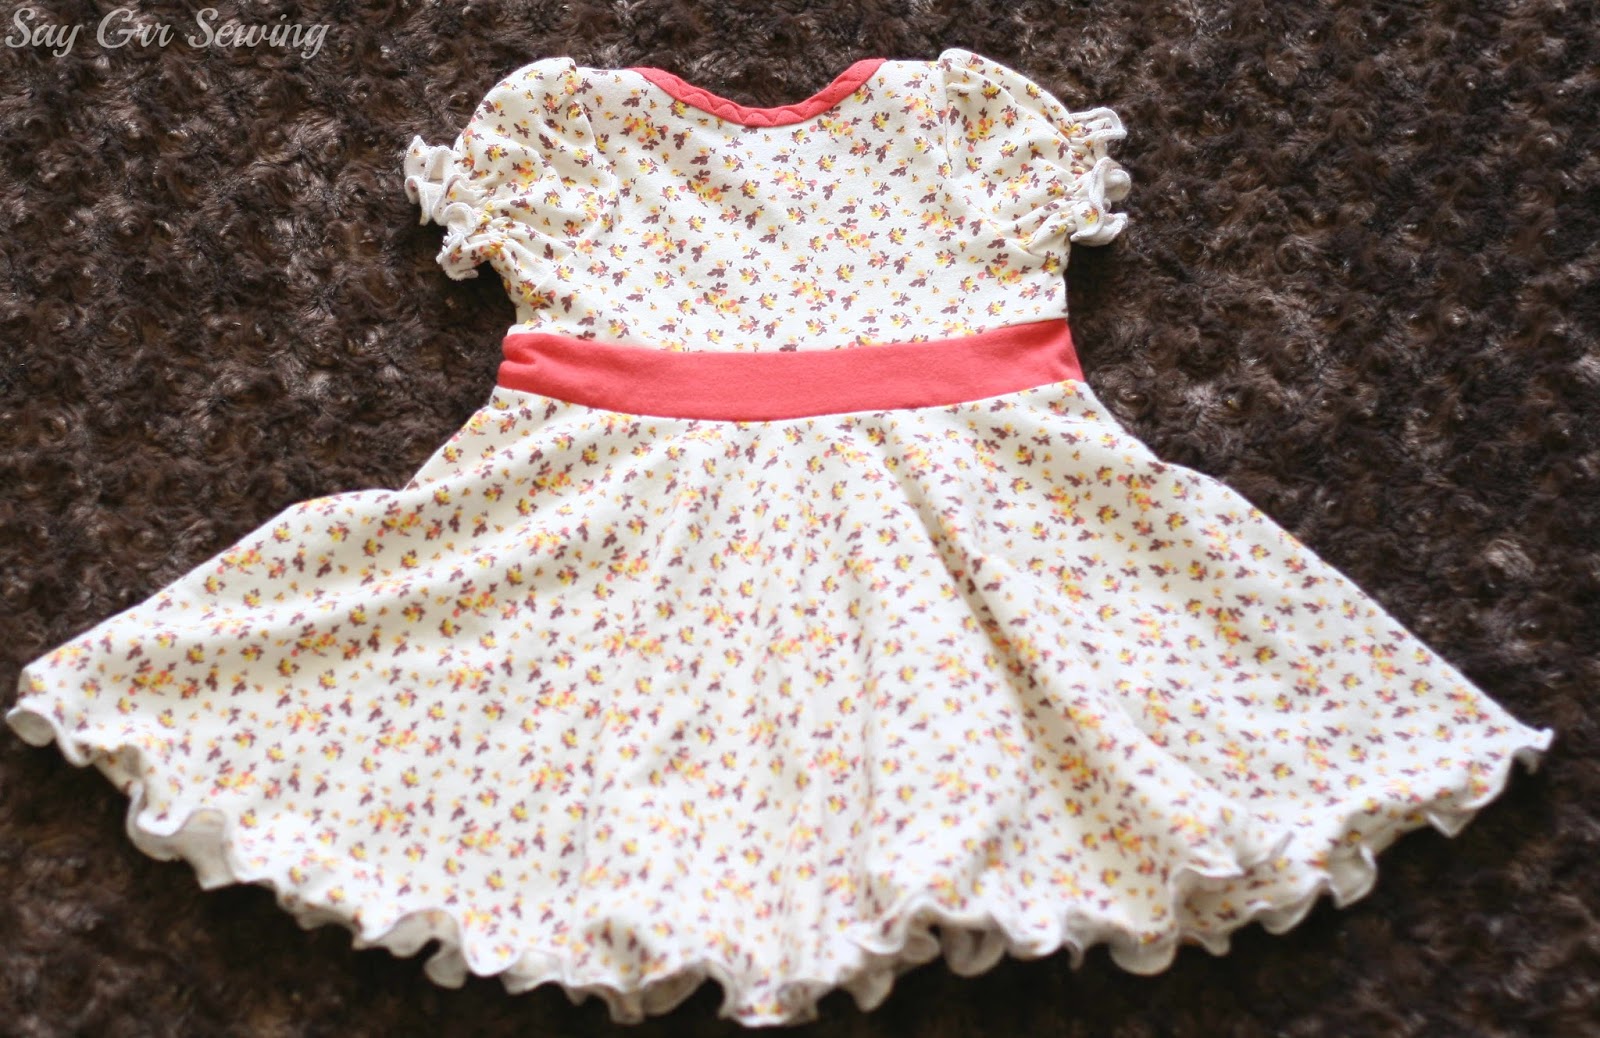
The knit for this dress was, yet again, from Girl Charlee in 2014 (but sadly no longer available)... I bought some of this to send Call Ajaire when I participated in Challenge Create and loved it so much that I bought more to make a shirt for myself, but never got around to sewing it. (I still have enough fabric if I decide to actually do that at some point.)

I really love how everything turned out, and I think all the pieces look darling on Foof!

Of course, it helps that she's ridiculously photogenic. ;-)

So much so that I have almost 40 photos of her wearing this outfit after deleting as many as I could bear to.

But I'll try to keep the photos of her to an acceptable level in this post. ;-)

She'd probably prefer that I posted them all:


Lettuce edging, dresses with circle skirts, shirring, knit, pattern modification, and puffed sleeves... all things I love!

Oh, I guess she has had enough with the photos!

There she goes! ;-)

Thanks for stopping by,