Friday, August 12, 2016

Third Birthday Drop-Waisted Dress

  For Becker's recent 3rd birthday, I sewed something super-simple:

  As with Booper's and Gaiw's third birthdays, I made some quick additions to a inexpensive ready-to-wear shirt, and sewed an accessory.

  I actually couldn't find a plain shirt in Becker's size, so I ended up buying one size up and slimming the sides down with my serger. The extra length gave me the idea for a drop-waist, but I thought gathers in this fabric would end up really bulky so I settled on a circle for the skirt portion.

  Which of course Beckers loves because it's twirly! ;-)
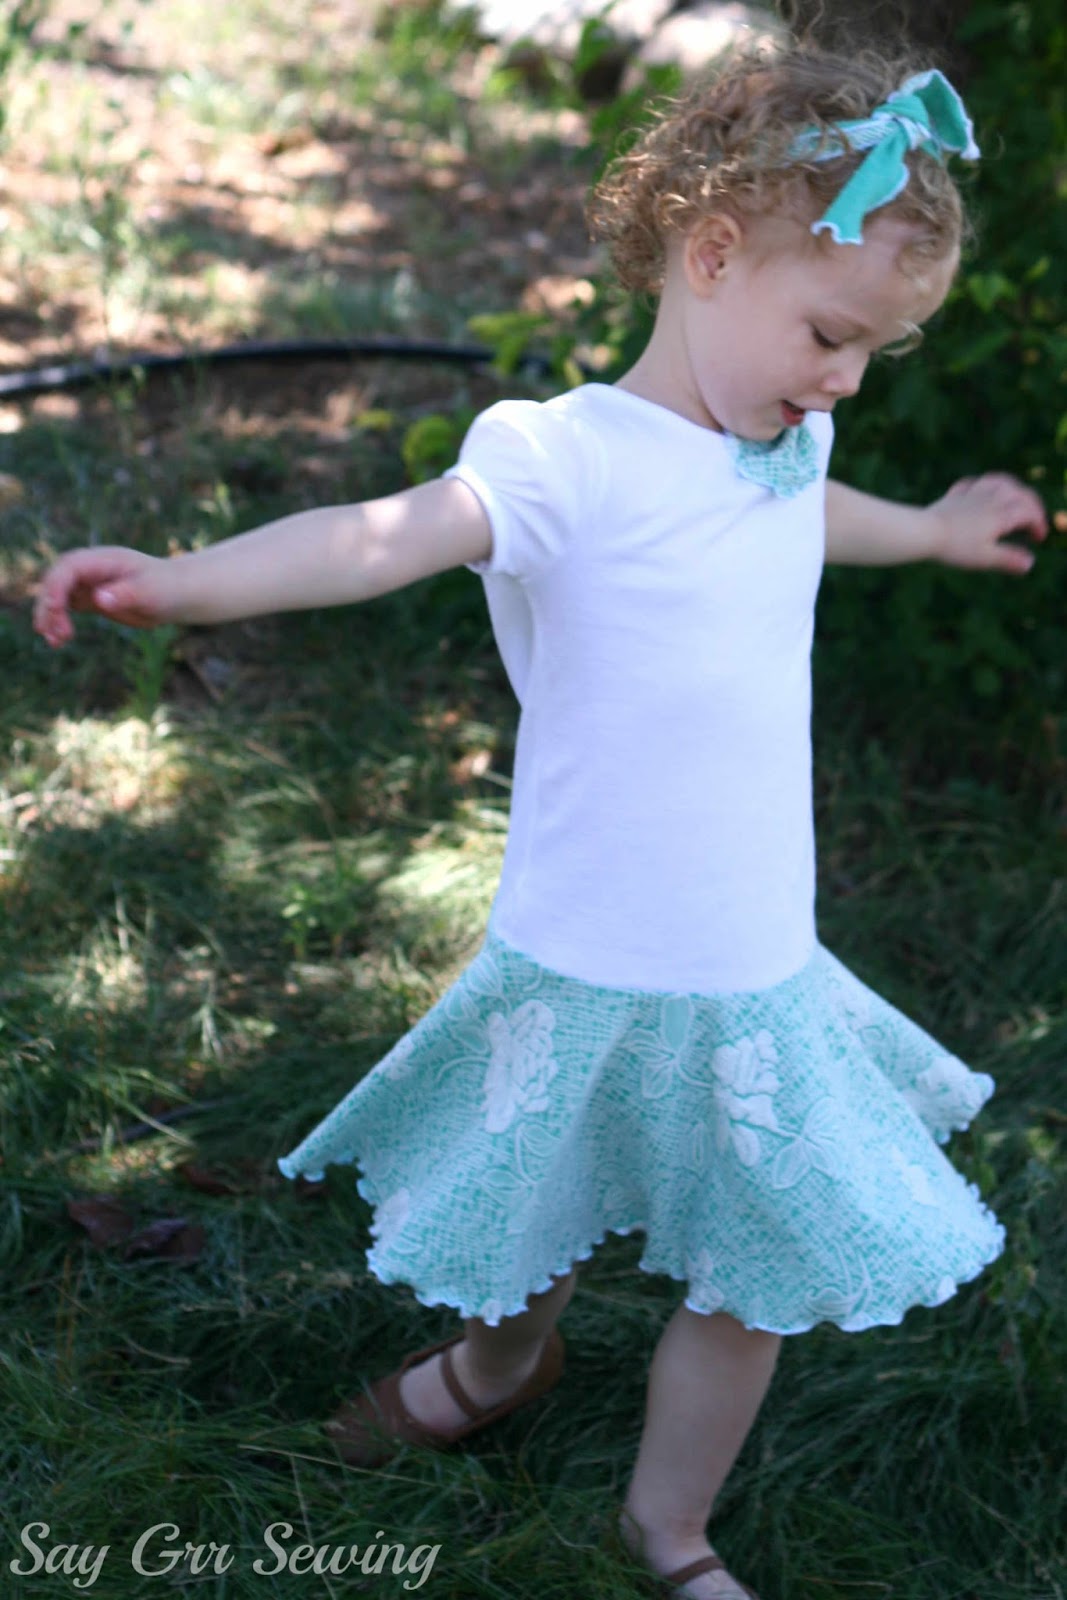
  I lettuce-edged the hem, then lettuce-edged an oval and a strip of the fabric (also used here) and turned them into a bow, which I sewed on by hand at the neckline.

  The headband is a long strip of knit (I think it was 27" long) lettuce-edged all the way around, and tied in a knot! I think it's super-cute on her!

  I'm having a hard time believing this little girl is three! She's my snuggler, and in a funny little voice says, 'Mama, I need you.' before climbing in my lap.

  Beckers is a bashful little girl, and loves to look at picture books and make up stories to go along with them.

  That doesn't mean she can't play with the best of them though! She's full of mischief and loves to make people laugh.

  When she's happy she has the cutest little squinty-eyed smile, and she has a penchant for climbing things and jumping off!

  She is the politest little girl I've ever met, and the one who needs the most hugs. She loves make-believe, and is much more likely to respond to a request if you pretend along with her!

  We are so happy that she is a part of our family.

  In addition to the dress and headband, she received a yo-yo (which subsequently became a 'pet turtle'), a recorder, and, at her request, a green flashlight. I also made her a cake! I planned to carve it into a teardrop shape, so I baked a cake from scratch thinking it would hold up better, then managed to drop one layer and break it. I decided I could just make it smaller, but when I tried to crumb-coat it, the layers crumbled all over the place! So I mixed the crumbs with the frosting, popped it in the freezer to firm up, then molded it into the right shape like a cake pop. ;-) I made marshmallow fondant, rolled some into sort-of circle shapes, and added it around the cake. I also added fondant leaves. It ended up like this:

  I'm pretty happy with it, although there things I'd change if I were to do it again! First, I'd freeze the cake layers before the crumb coat, as suggested by Sarah! Second, I would try using regular fondant instead of marshmallow fondant, as I think it's a little firmer, and I would make more of it so I'd have enough for a full-blown rose. I would set the inner petals lower, so they don't rise above the tip of the cake, and I'd make them shorter, so the base of the rose wouldn't end up with so much fondant on it! But still, it's much better than a lot of my cake attempts! ;-)

  Beckers loved it- she kept saying, "It's my birthday, because I'm the birthday girl! And I am three!"

Thanks for stopping by,

Tuesday, August 2, 2016

Étage Dress

  I bought the Étage pattern from Sew Straight and Gather some time ago on a black Friday sale... I think in 2014! So in the interest of reducing the number of un-sewn patterns I own, I made it up for Gaiw.

  I used some black cotton spandex knit from Nick of Time Textiles, a rose-print rayon jersey knit from Girl Charlee (also used here), and some white cotton spandex from Girl Charlee for the interior.

  While Gaiw loves her new dress and I think it's pretty cute, I can't say I'm particularly pleased with the pattern. Firstly, there are a lot of pieces to print, and some of them feel pretty redundant.

  For example, the back and front outer bodice are identical except for the neckline, but are printed as two separate pattern pieces, and the same is true of the bodice lining pieces. The main hog is those tiers, but again, a slight pattern change (swapping the a-line interior for a simpler rectangle) would eliminate several pattern pieces. It's not a huge deal, and I understand why the pieces are the way they are, but I don't love it.

  Also, very few of those pieces are trued and the armscye is excessively tall and shallow... there is less than 2" of width there!

  I would like it better if the pattern matched the illustration too, with the longest point of the bodice over-layer hitting at the side seam, instead of slightly to the front and back.

  The pieces fit together well though, and for the most part the instructions were decent. There are some inconsistencies in things like hemming methods though... one of which would result in a hem 2cm longer than another one.

The fit seems pretty true-to size- I chose a size using Gaiw's chest measurement, then based on the finished measurements I added some length to the bottom tier only (I wish I'd spread the additional length through all of the pieces for a more balanced look) and it hits where I expected.

 I lettuce-edged the sleeves:

  And all of the other hems!

  I'd raise the neckline in the front, but that's just my preference.

  I really like the idea of this dress, and the end result is pretty cute, but I don't think I'd make it again without some changes.

  I noticed that it's not available in the Sew Straight and Gather shop at the moment though, so maybe it's being updated? I hope so! =)

  Thanks for stopping by,


Saturday, July 23, 2016

Another Raglan Shirt

Not too long ago, I had the itch to make something quick, and settled on a raglan shirt. The first two I made have been worn a lot so I thought a third couldn't hurt!

  I made this one in a lace-look rayon spandex blend knit from, of course, Girl Charlee, and sadly no longer available. It was pretty see-through, so I used white cotton spandex for the sleeves, pocket, and to line the body.

  Since the two fabrics drape differently, I didn't want to risk hemming them together, and decided to make a feature of it. I added an inch to the lining only, and lettuce-edged them separately.

  I had a rough time with the pocket... it was just so shifty!

  Something about the way these fabrics sit makes this pocket look kind of awkward too... like it's either too big or too small. I'll probably leave it off entirely if I make this shirt again.

  I raised the neckline 3/4" all around, and transferred some of the back sleeve width to the back bodice to even out the shape a little... unfortunately all the photos I took of the back are pretty blurry! This is the best one. I think it looks better this way though.

  I hemmed the sleeves with a twin needle after lengthening them 1/2". I didn't try to fix the underarm puckering yet, mostly because I don't know how and am going to have to do a lot of experimenting. ;-)

  I wasn't actually planning on posting this yet, as I have a backlog of other projects... but I don't want to post about the other ones yet for various reasons, so a shirt it is! ;-)

  And there you have it! Isn't that fabric pretty? Although it's bright enough that I feel awkward when wearing it... I much prefer to wear dark neutrals!

Thanks for stopping by,

Tuesday, July 12, 2016

The Mushroom Dress

  I've heard for years about how fantastic Oliver + S patterns are. For a very long time, I didn't sew any of them, because they are definitely on the pricier side and the size ranges are generally smaller. However, when they ran a sale on digital patterns a while back, I finally bought three. I had the chance to sew one of them in May, and here it is!

  This is the Family Reunion dress, in the smaller size range and the PDF version. Becker's chest measurement put her in a size 18-24 months, and a 3T for height. I decided to allow for growing room, so I sewed a size 2T and added 3" to the hem.

  I wasn't particularly impressed with the PDF... in some places the background grid wasn't where it was supposed to be, and there were an awful lot of pages to print for the size range and style! It was also assembled a bit oddly... parts of some of the pages are cut off and rotated around to connect with other pages. In spite of that space-conserving measure, there were several ways the PDF could have been laid out better to reduce the number of pages to print.

  Once I got past the printing and assembling though, the pattern was impeccable!

  Seriously, it has notches in all the right places, the pieces are all trued perfectly and fit together beautifully, and the curves are nicely shaped. And you can see that, even though it's a little loose on Beckers, the drafting is excellent.

  I liked the instructions too... they are very well written and illustrated, and some of the steps were done in new-to-me ways that produce a nice garment.

  For example, the shoulder seams are sewn in two parts so the seam edges don't peek out at the neckline. It does leave a small raw edge though, as shown below.

  I like the 5 rows of stitching at the hem too. These were supposed to be sewn all the way to the edge but I stopped at the inner edge of the placket.

  I sewed actual buttons and buttonholes too!

  After searching through all my buttons, I couldn't find anything that, 1. worked with the cam sizes for my buttonholer, 2. was a good color for this fabric, and 3. I had six of! Finally I had the idea to use some fun vinyl-printed wooden buttons, and just put the plain back facing out! I just used the ones that I didn't love the print on as much. ;-) And the buttonholes are done with a vintage Singer buttonholer.

  There are also a couple of buttons one the front... I only had a few of these carved wooden buttons. The color wasn't quite right so I colored them with a brown Sharpie and ended up really liking it. As expected, the marker has already slightly worn off the high points since I took these photos, but I think they still work.

  I'm delighted with my edge-stitching on this one! Here's the inside of the hem:

  And my favorite, the external facing edges:

  The fabric is a mushroom-print quilting cotton that I found at a yard-sale years ago, leftover from making a coin purse, and brown quilting cotton leftover from the girls' Christmas dresses.

  I'm pretty happy that I was able to sew this up without buying anything new except the pattern!

  The only thing I might change about the way this is sewn is the armscye... I think it would sit a little bit better to sew at least the underarm portion after sewing the side seams.

 Overall, aside from the PDF hassle, I enjoyed my first foray into Oliver + S patterns, and there will be more!

Thanks for stopping by,