Here's another non-sewing gift I made last year- this one was for my brother-in-law, and wasn't as easy as I'd hoped it would be!
I used a silkscreen stencil set for it, and the set was quite pricey (although I did use a coupon!), so I'll definitely have to use it again elsewhere! That part went pretty smoothly, although the margins around the letters weren't the same size from letter to letter, so it took some playing around to get them mostly even.
But painting everything else on wasn't so easy! The slippery surface of the glazed ceramic made things go in directions I totally didn't expect. I wiped several sections off with a damp paper towel and re-did them multiple times before deeming it 'good enough'.
I picked this mug because of the red interior, and the paints I used were Martha Stewart brand. I used red, grey, black, and yellow... I think some were high-gloss and some were satin or matte- I just picked based on color. (I already had the black from this project.)
I picked some titles that suit this brother in law to paint on, then alternated between script, sans, and serif hands in a few colors.
I left the opposite side of the mug blank:
But if the silkscreen set had come with a larger version of the same letters, I would have added a large 'R' there!
The paint seems to stay on pretty well once baked- I don't have a working dishwasher to test it with, but it didn't scrape off with a fingernail, and water didn't harm it either. And that's it for this gift!
Thanks for stopping by,
Sunday, March 11, 2018
Sunday, March 4, 2018
Vinyl-Decorated Shirts of 2017
I didn't make nearly as many shirts with vinyl designs on them last year as I did in previous years, but I did still end up with a few. Aside from my husband's, which I already blogged about, here they are!
First, one for my youngest brother, in July. As usual, I used Jalie 2918 with a slightly narrowed neckband:
This brother loves to 'geek out' about photography and music, among other things, and he has a slightly sarcastic sense of humor, so I thought this would work for him:
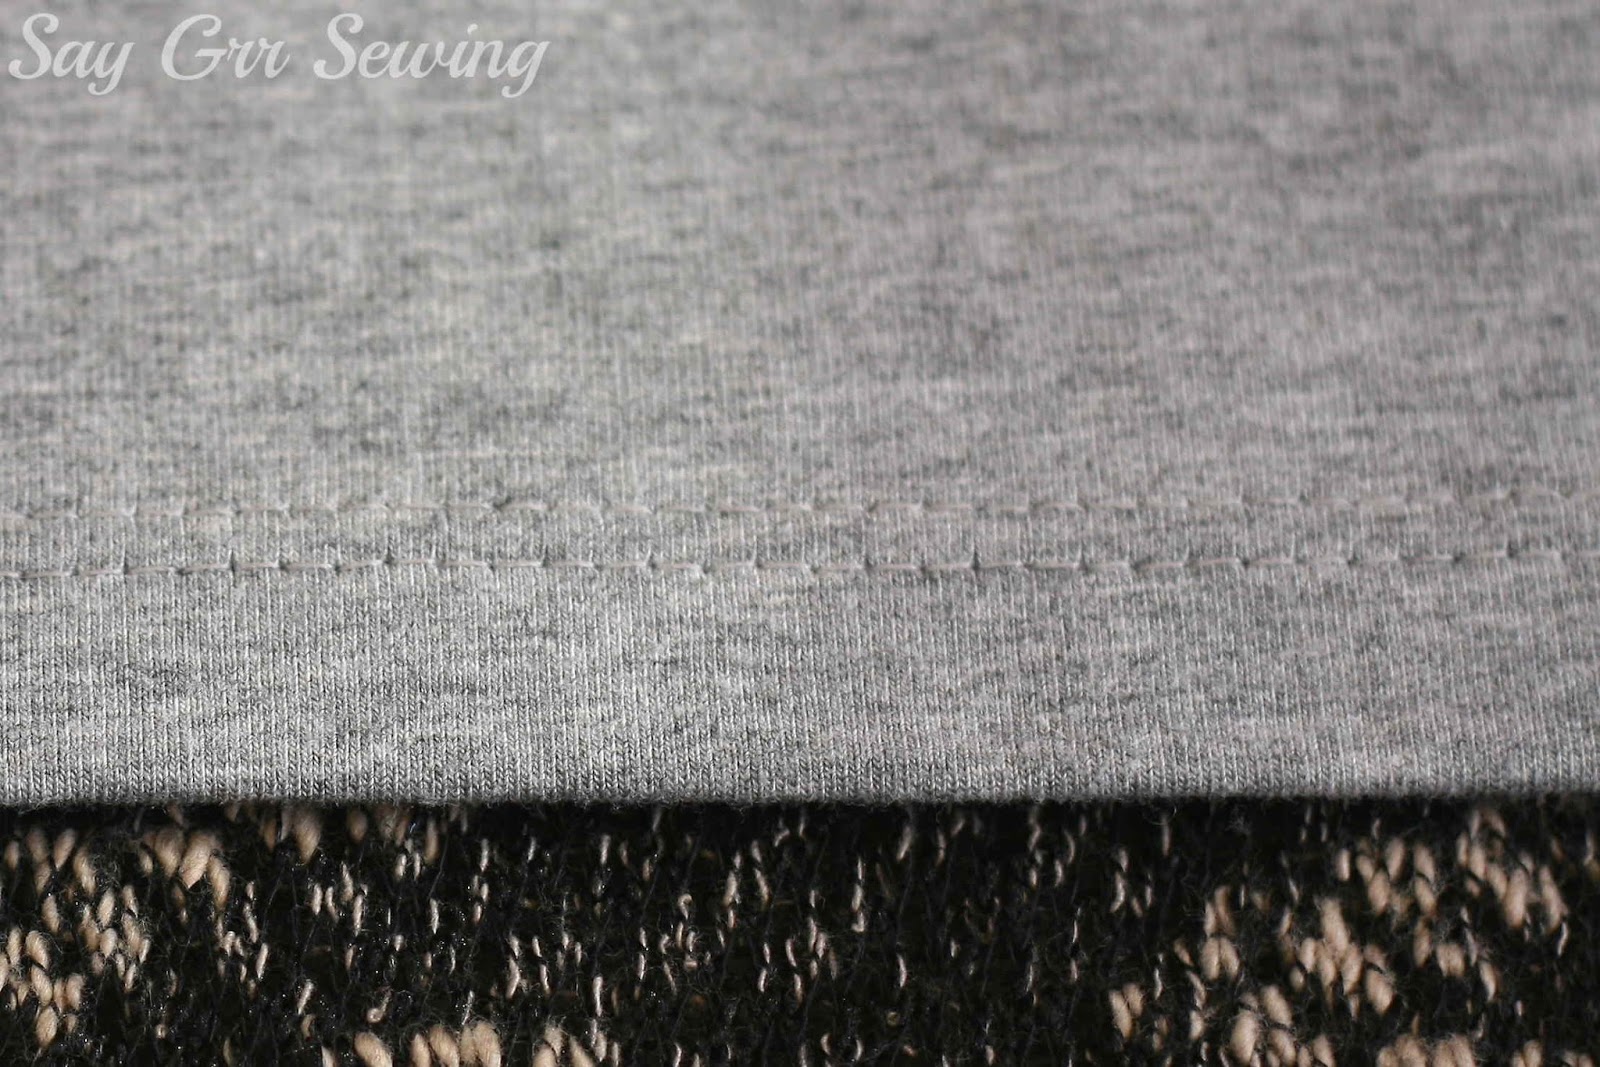
I didn't even end up taking any photos of the back, as it was just plain, but I did get one of that twin-needled hem:
Next, a pair for my sister-in-law's baby and husband. The husband one is Jalie 2918, and the baby one is Jalie 3133. The fabric for these and the prior shirt is grey 12-oz knit from Nick of Time Textiles
I used brown vinyl and a slightly western-looking font for these- I had a hard time striking a balance with size, since the adult shirt has much less text than the baby one, and the smaller the font got, the busier it looked.
It worked out in the end though!
I cut the pattern straight across just above the bodysuit portion of the baby pattern, added a hem allowance, and hemmed it.
I decided to go with the envelope neck even though it doesn't match the crew-neck of the adult shirt as well, because I wasn't sure how well the crew-neck on the baby pattern would go over a baby head!
As with last time, I changed the sewing order so the sleeve would be finished more neatly:
And finally, my favorite, and the one I spent the most time on- one for my sister-in-love. She loves being a mama, and I was actually planning to make a shirt with this design on it for her last year but switched to a dress last-minute. Pink is her favorite color, so I had to use that for the shirt! I was originally planning to use white for the vinyl, but it just didn't show up well enough, so I went with bright pink instead.
I hand-drew the design for the front of this one, then scanned it in and went over it in Illustrator before moving it into Silhouette Studio and cutting it, which is why it took significantly longer!
I added a little heart to the shoulder:
And a pair of them on the back:
I used Jalie 2805 for this one, but went a size up from A's measurements for a more relaxed fit. The knit is from Girl Charlee- I think it's this light pink, but I bought it a couple of years ago so I'm not positive.
I used bright pink thread that matched the vinyl for the hems:
I'm really happy with this one!
And that's it for last year's vinyl-decorated gifts!
Thanks for stopping by,
First, one for my youngest brother, in July. As usual, I used Jalie 2918 with a slightly narrowed neckband:
This brother loves to 'geek out' about photography and music, among other things, and he has a slightly sarcastic sense of humor, so I thought this would work for him:
I didn't even end up taking any photos of the back, as it was just plain, but I did get one of that twin-needled hem:
Next, a pair for my sister-in-law's baby and husband. The husband one is Jalie 2918, and the baby one is Jalie 3133. The fabric for these and the prior shirt is grey 12-oz knit from Nick of Time Textiles
I used brown vinyl and a slightly western-looking font for these- I had a hard time striking a balance with size, since the adult shirt has much less text than the baby one, and the smaller the font got, the busier it looked.
It worked out in the end though!
I cut the pattern straight across just above the bodysuit portion of the baby pattern, added a hem allowance, and hemmed it.
As with last time, I changed the sewing order so the sleeve would be finished more neatly:
And finally, my favorite, and the one I spent the most time on- one for my sister-in-love. She loves being a mama, and I was actually planning to make a shirt with this design on it for her last year but switched to a dress last-minute. Pink is her favorite color, so I had to use that for the shirt! I was originally planning to use white for the vinyl, but it just didn't show up well enough, so I went with bright pink instead.
I hand-drew the design for the front of this one, then scanned it in and went over it in Illustrator before moving it into Silhouette Studio and cutting it, which is why it took significantly longer!
I added a little heart to the shoulder:
And a pair of them on the back:
I used Jalie 2805 for this one, but went a size up from A's measurements for a more relaxed fit. The knit is from Girl Charlee- I think it's this light pink, but I bought it a couple of years ago so I'm not positive.
I used bright pink thread that matched the vinyl for the hems:
I'm really happy with this one!
And that's it for last year's vinyl-decorated gifts!
Thanks for stopping by,
Sunday, February 25, 2018
Wood-Burned Cutting Board and Utensils
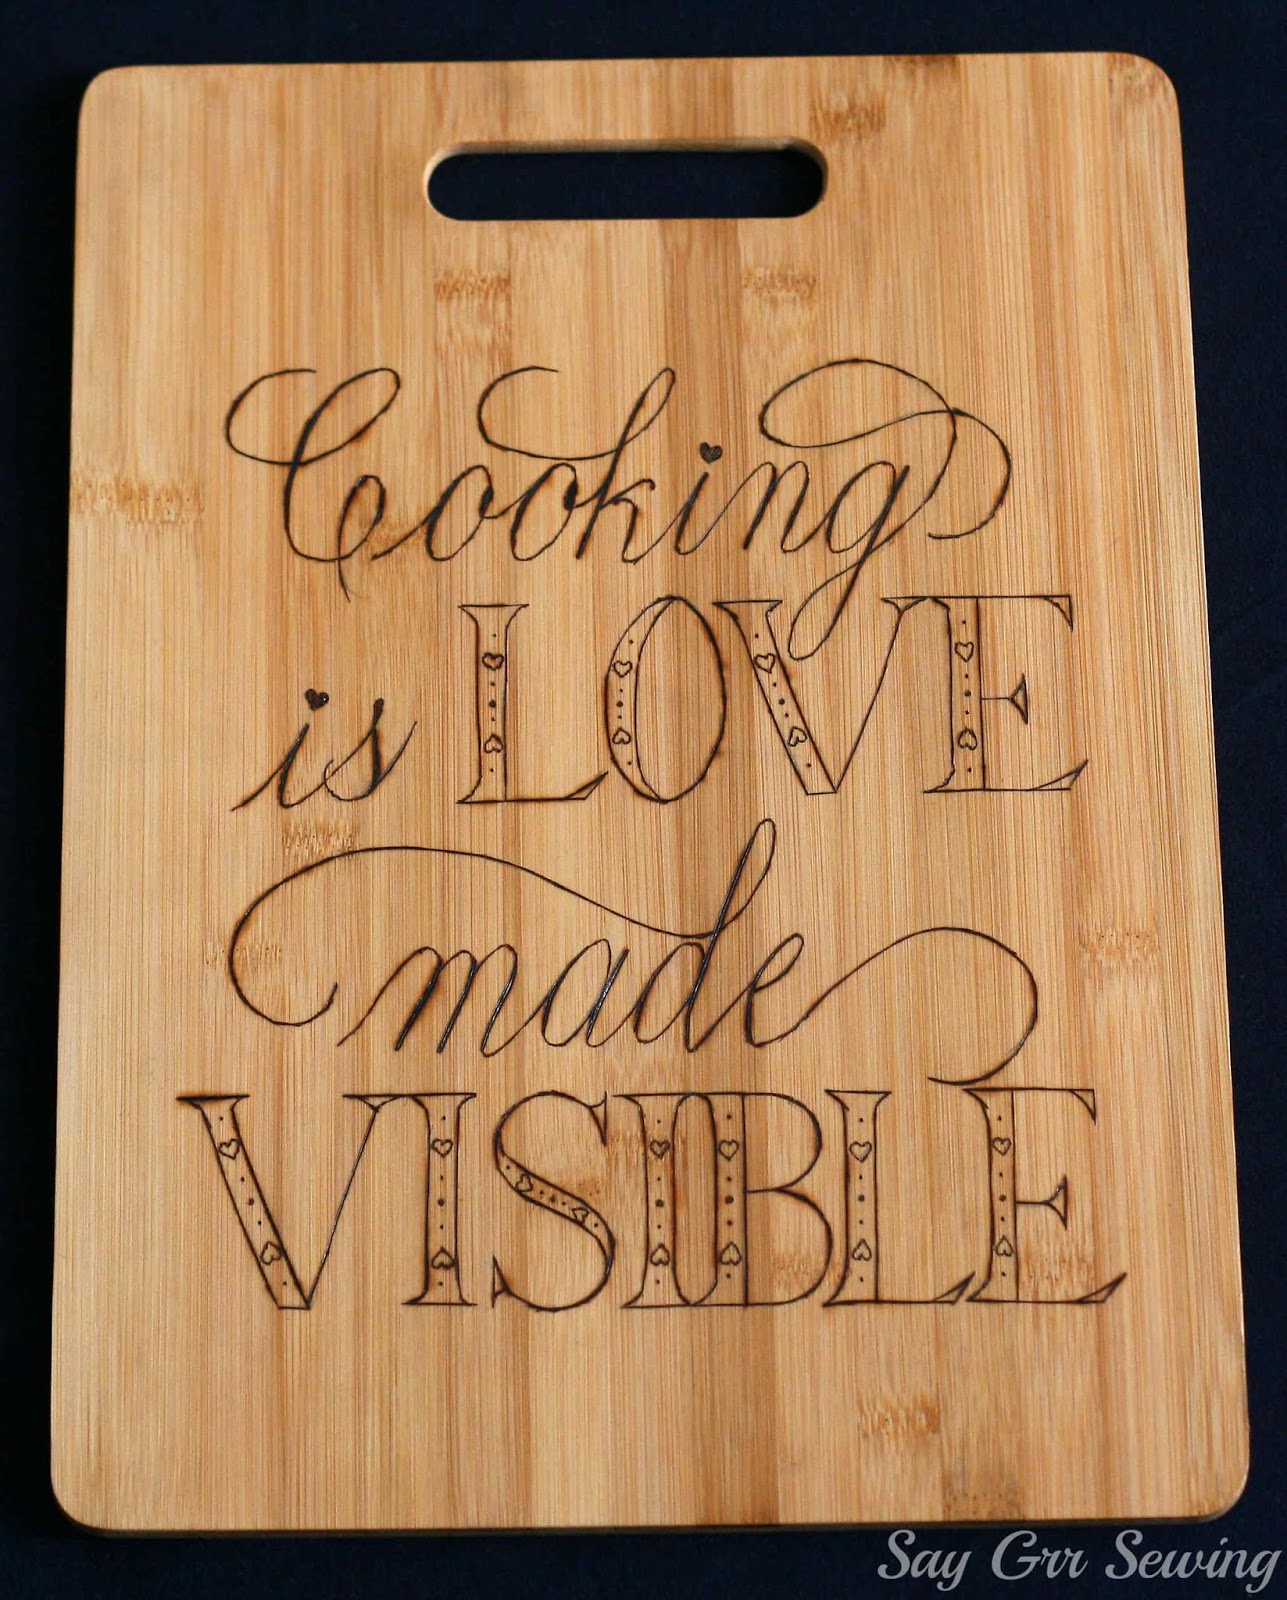
I was planning to make some wood-burned utensils for my Mom's birthday last year, but when my friend Becky posted a few beautiful cutting boards that she'd wood-burned on Instagram, I decided that I needed to make one of those as well! I searched for a good cooking-related quote, and came across this one:
It's perfect for Mom, because she really does pour a lot of love into her cooking! I drew the quote out on paper first, then rubbed all over the back of the paper with a pencil, then taped the design on the cutting board and re-drew all of my lines, firmly, to transfer the graphite to the cutting board.
It probably would have worked better with a softer lead, but it was enough to give me a guide to trace over again with pencil.
I couldn't find a wooden cutting board that didn't already have some kind of design on the surface, so I went with this bamboo one. I was nervous about it burning well, but it was actually easier to neatly burn this than the wood things I've tried.
I had to do the wood-burning all at night, after the kids were in bed... that tool gets incredibly hot!
I added little hearts and dots inside the larger letters- I love how that looks!
It's definitely not polished, but I love how this turned out!
Then, to go with it, I burned a set of bamboo utensils:
For these, I just sketched some designs in pencil directly on the utensils, then burned them.
I did different, but complementary, designs on each one:
I added little hearts at the ends of the handles:
The backs of the utensils also have the hearts on the handles, but are otherwise plain:
Again, I really love these! And I learned a lot while making the cutting board, so these are a tad less rustic.
Here's the whole set together- I definitely wanted to keep this!
And here's how I wrapped it:
Thanks for stopping by,
Wednesday, February 21, 2018
Wood Plaque
Here's something I made for my Dad's birthday last year:
I found this unfinished wood piece at Walmart and wanted to make something with it for my Dad's office.
First, I stained the wood by watering down some acrylic paint and brushing it all over, then wiping off as much as I could. I intentionally left the stain slightly uneven for a weathered look. The edges really soaked it up, so I only did one coat on those and double-coated the rest of the plaque.
I tested out some paints with my pointed pen on a little matching wooden tag, but everything was either too thick to write with, or once I'd thinned it, bled everywhere. So I ended up using a calligraphy ink, even though it wasn't waterproof. I still couldn't make regular down-strokes, because of bleeding, so I just did gentle parallel down-strokes to make them thick enough.
After sketching my design on plain paper with pencil, I transferred it to the plaque the same way I did for this canvas, then went over it with the ink. I used the pointed pen for all of the script, and a combination of pointed pen and a small brush for the larger letters.
Once everything was dry, I very, very carefully brushed on a layer of clear acrylic sealer, and once that was dry, a second layer.
It's pretty imperfect up close, but I love the overall look. My only regret is not sanding the wood piece down before beginning to work on it!
I had fun wrapping this one too! I have a compass seal, which I thought went nicely with the verse on the plaque, so I used that along with some black cardstock and thread, brown ribbon, copper wax, and gold ink, to get this:
As you can see from the tag, this one was late. In fact, all but one of the gifts made after May last year were late. I don't think anyone but me minded though!
Thanks for stopping by,
I found this unfinished wood piece at Walmart and wanted to make something with it for my Dad's office.
First, I stained the wood by watering down some acrylic paint and brushing it all over, then wiping off as much as I could. I intentionally left the stain slightly uneven for a weathered look. The edges really soaked it up, so I only did one coat on those and double-coated the rest of the plaque.
I tested out some paints with my pointed pen on a little matching wooden tag, but everything was either too thick to write with, or once I'd thinned it, bled everywhere. So I ended up using a calligraphy ink, even though it wasn't waterproof. I still couldn't make regular down-strokes, because of bleeding, so I just did gentle parallel down-strokes to make them thick enough.
After sketching my design on plain paper with pencil, I transferred it to the plaque the same way I did for this canvas, then went over it with the ink. I used the pointed pen for all of the script, and a combination of pointed pen and a small brush for the larger letters.
Once everything was dry, I very, very carefully brushed on a layer of clear acrylic sealer, and once that was dry, a second layer.
It's pretty imperfect up close, but I love the overall look. My only regret is not sanding the wood piece down before beginning to work on it!
I had fun wrapping this one too! I have a compass seal, which I thought went nicely with the verse on the plaque, so I used that along with some black cardstock and thread, brown ribbon, copper wax, and gold ink, to get this:
As you can see from the tag, this one was late. In fact, all but one of the gifts made after May last year were late. I don't think anyone but me minded though!
Thanks for stopping by,